Easter Eggs - The Way Nature Intended Them
- Tilia Botanicals
- Apr 13, 2022
- 3 min read


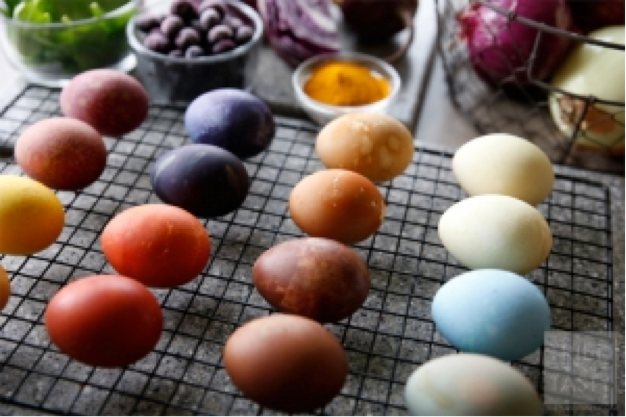
This month we thought we would feature a fun craft to celebrate Spring this Easter. Many people find the earthy tones of herb and food coloured eggs to be far more attractive than the Easter Bunny’s candy colours (and of course healthier too!). Many herbal dye plants, used traditionally to colour wool and other natural fibres, can be used for Easter eggs in place of commercial dyes. Natural ingredients like herbs and spices offer an endless variety of hues for dyeing eggs — from the soft purple shades of hibiscus to the rich gold tones of turmeric. Dyeing with nature takes a bit more patience, and a bit more openness to whatever nature decides to deliver... but that’s what makes this activity such creative fun — and the results are so stunning.


What you will need to get started:
Mordant — Alum, cream of tartar, or white vinegar will help the colours penetrate the eggshell (mordants aren’t necessary, but you’ll get better results if you use one).
Pots — Enamel or glass pots (not aluminum) are best.
Water — Use distilled water or water that is chlorine-filtered.
Eggs — White eggs will display the subtle, natural colours better than brown or green eggs.
Dyestuff — The more eggs you’re dyeing, the more dyestuff you’ll need. Have fun experimenting with herbs and spices to see what colours they impart, but here are some suggestions to get you started.
Ingredients for Color:
Gold: yellow onion skins (keep checking your eggs because they will gradually darken to red)
Yellow: turmeric, dried calendula or marigolds, goldenrod, cosmos, or a handful of carrot tops
Green: coltsfoot, nettles or sweet woodruff, spinach leaves*; we find that combining red cabbage and turmeric consistently produces the brightest green colour for us!
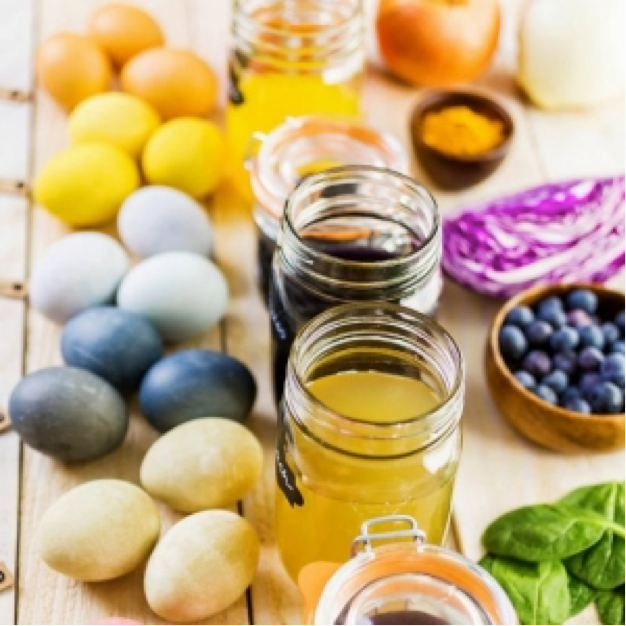
Blue: woad, wild indigo root, chopped red cabbage*
Pink: chopped beets, cranberries, raspberries
Purple: frozen blueberries, elderberries
Brown: coffee grounds or black tea bags
Reddish brown: chili powder, yellow or red onion skins (when left in dye longer)
Orange: paprika
Reddish blue/lavender: hibiscus flowers
Violet Blue: violet blossoms, small quantity of red onion skins and red cabbage combined*
Red: yellow or red onions skins (again, keep checking the eggs and remove once they're the desired red colour)*, canned cherries with juice, pomegranate juice
*For best results with this colour, add botanicals to the water while cooking eggs.
The Process:
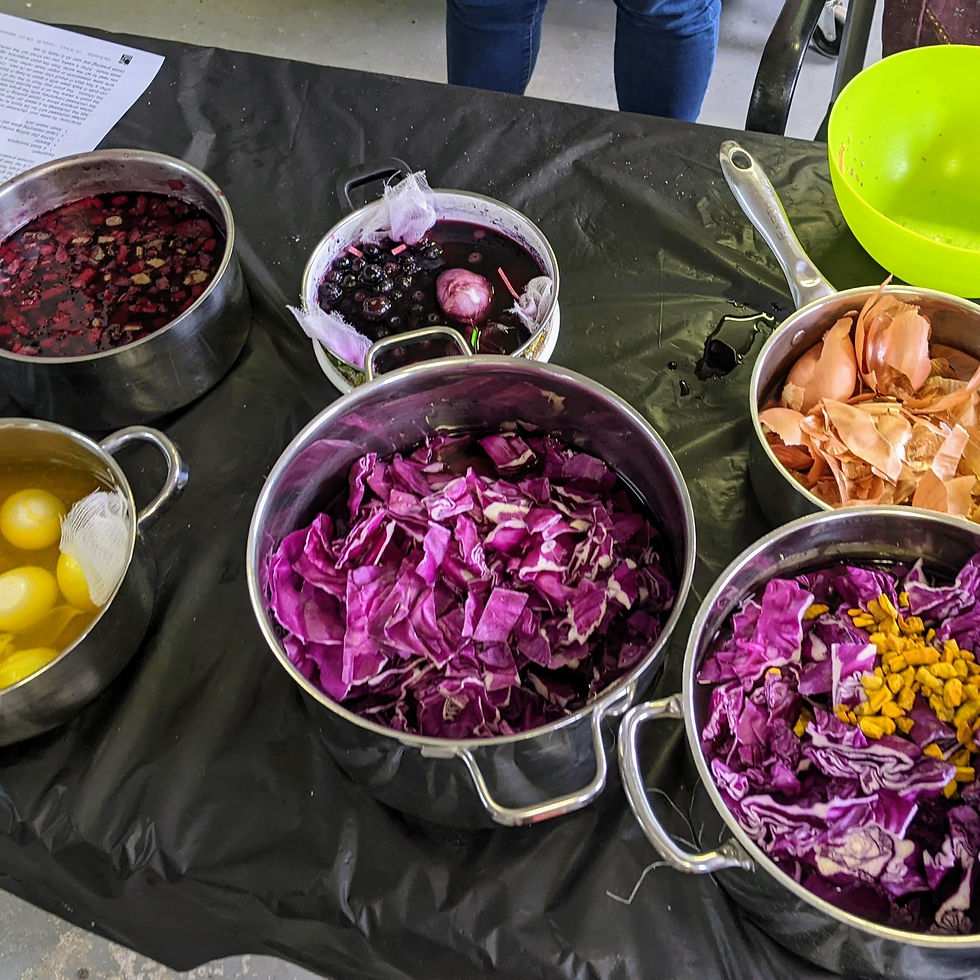
Once you get the hang of dyeing naturally, you’ll work in panfuls and handfuls, but here are some guidelines to get you started:
» 4 cups water
» dyestuff (about 2-4 tbsp. ground herbs and spices or 1 cup whole or cut and sifted)
» 1 tablespoon mordant (see above for list)
» 4 to 6 eggs, washed to remove any coating (Use raw for hot bath, hard-boiled for cold.)
There are two easy ways to dye eggs with natural dyestuffs. One is a hot method, which delivers the deepest colours; the other is cold. You might try each, or use them in combination.
Hot Bath Directions
Bring water, dyestuff, and mordant to a boil. Add eggs and reduce heat to a simmer. Cook for about 15 minutes, remove from heat, cover and let sit another 15 minutes or more, until desired colour (the longer you leave the eggs in the dye, the deeper the colour). Remove eggs, gently rinse in lukewarm water, and let air dry.
Cold Bath Directions
Make a dye bath by bringing water, dyestuff, and mordant to a boil. Simmer the dyestuff until the water is deeply coloured, anywhere from half an hour to a couple of hours (put a lid on the pot to prevent evaporation). Strain the liquid and cool. Add hard-boiled eggs to the dye, and let soak until desired colour is reached (overnight, in the refrigerator, if you like).


Tips and Tricks
» Add sheen to your eggs by gently wiping the dry, dyed shell with vegetable oil.
» Consider dyeing an egg in more than one colour (let dry between dyeing).
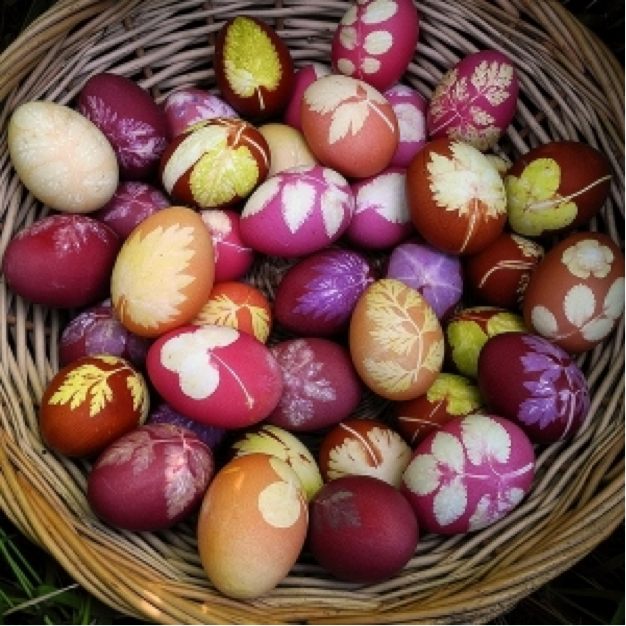
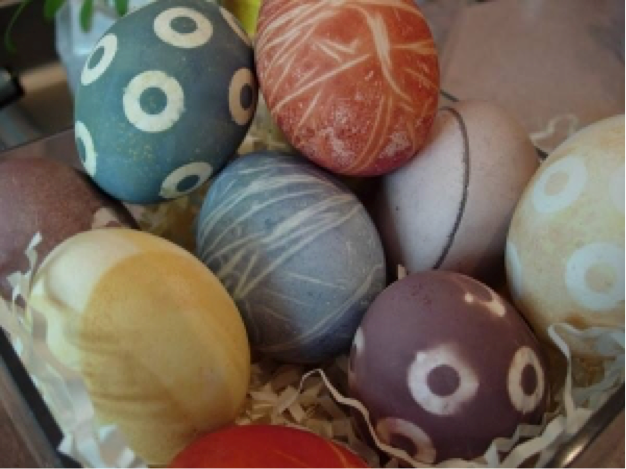
» Experiment with fun techniques: wrap an egg in rubber bands, stickers or apply masking tape in patterns before dyeing, for a batik effect. Or wrap an egg in leaves (hold them in place with a nylon stocking) before dyeing. For a stippled effect, pat an egg with a sponge while still wet. And to marbleize your egg, add a drop of oil to the dye liquid.
» For a smoother look, dye eggs in strained liquid. For more texture, leave in the dyestuff.
» Don’t over- stir the eggs while simmering, or over-handle them once you remove them from the dye. The outer shell, softened from the mordant, can rub off.
We hope we've inspired you to get creative this Easter and celebrate with the colours of nature!

Comments